Supply
|
Chuckwagon
Supply |
||||
|
Company Information |
Products/ Services |
Tips
& Techniques |
Recipe Archive |
Events
& Contacts |
Dutch Oven
Frequently Asked Questions
Tips & Techniques
Heat sources for a Dutch oven:
What size of Dutch Oven do I need?
![]() We
will be happy to answer your questions about Dutch ovens, Dutch oven accessories,
Dutch oven cooking, or outdoor cooking generally. Simply send an e-mail
with your question. We will reply via e-mail with your answer. Just try
and stump us. If we don't know the answer we will get it for you.
We
will be happy to answer your questions about Dutch ovens, Dutch oven accessories,
Dutch oven cooking, or outdoor cooking generally. Simply send an e-mail
with your question. We will reply via e-mail with your answer. Just try
and stump us. If we don't know the answer we will get it for you.
![]() Listed
below in no particular order (at this time anyway) are questions and answers
about Dutch ovens and Dutch oven cooking.
Listed
below in no particular order (at this time anyway) are questions and answers
about Dutch ovens and Dutch oven cooking.
A: In today's usage, the term "Dutch oven" designates a heavy metal, covered pot used for cooking. Dutch Ovens can be made of cast iron (very heavy) or of aluminum (relatively light weight). Most Dutch ovens today have metal legs to support the oven over the heat source. The lids of most Dutch ovens fit tightly into the bottom oven and have a rim around the edge to hold the charcoal or coals."
Q: What is the history of Dutch Ovens.
A: For a brief history of Dutch Ovens follow this link.
Q: I have heard that you have to "Season" a Dutch oven before you use it. What does this mean and how do you prepare the oven before using it the first time?
A: How to Season a Dutch Oven
There are many variations on the process for seasoning a Dutch Oven. However, they all have the same basic approach. The objective is to bake onto the surface of the oven a coating of oil, which becomes like lacquer. The seasoning does several things. First, it prevents the metal from rusting, second, it creates a non-stick surface making clean up easier, and third, it adds a delicious subtle flavor unmatched by other types of cookware.
Lodge� Dutch Ovens come from the foundry with a thin waxy coating designed to prevent rusting until the oven can be properly seasoned. This coating will be washed off and any residue burned off in the seasoning process.
Most of the following instructions come directly from Lodge� , with a few comments of our own.
- Warm utensil - Peel off any labels.
- Wash, rinse, & dry. Grease inside lightly with solid shortening, e.g. Crisco.
- Bake at 300˚ in a conventional oven for one hour. [Don't be alarmed by the smoke that will come from your oven as the shortening is burned onto the metal surface of the Dutch Oven. Open the doors and windows and temporarily turn off the smoke alarm.]
- After the oven has cooled, wipe out any excess grease and store with a paper towel in the Dutch Oven with the edges hanging out from under the lid to absorb any excess oils and to allow air to enter the oven.
- It may be necessary to repeat this process if part of the oven did not season properly.
Over time your oven will develop a hard, smooth, black coating on the inside of the oven. When you reach this point you will truly have a "seasoned" oven that you will not want to part with.
Q: How do I clean my Dutch oven?
For Most Dutch Oven enthusiasts there are a few "DO NOTS" when is comes to cleaning a Dutch Oven.
- Do NOT use dish soap or detergent (it can leave a soapy taste in the oven that may transfer to the food.)
- Do NOT use a metal scrapper or scouring pad (it can remove the "hard-earned" seasoning.)
- Do NOT put cold water on a hot Dutch Oven (it can cause the oven to crack.)
- Do NOT "burn out" your Dutch Oven over the fire. (It can warp or crack the oven.)
For best results, Dutch Ovens should be cleaned immediately after they are used. If needed, you can put some hot water in the oven to let it soak while you finish your meal.
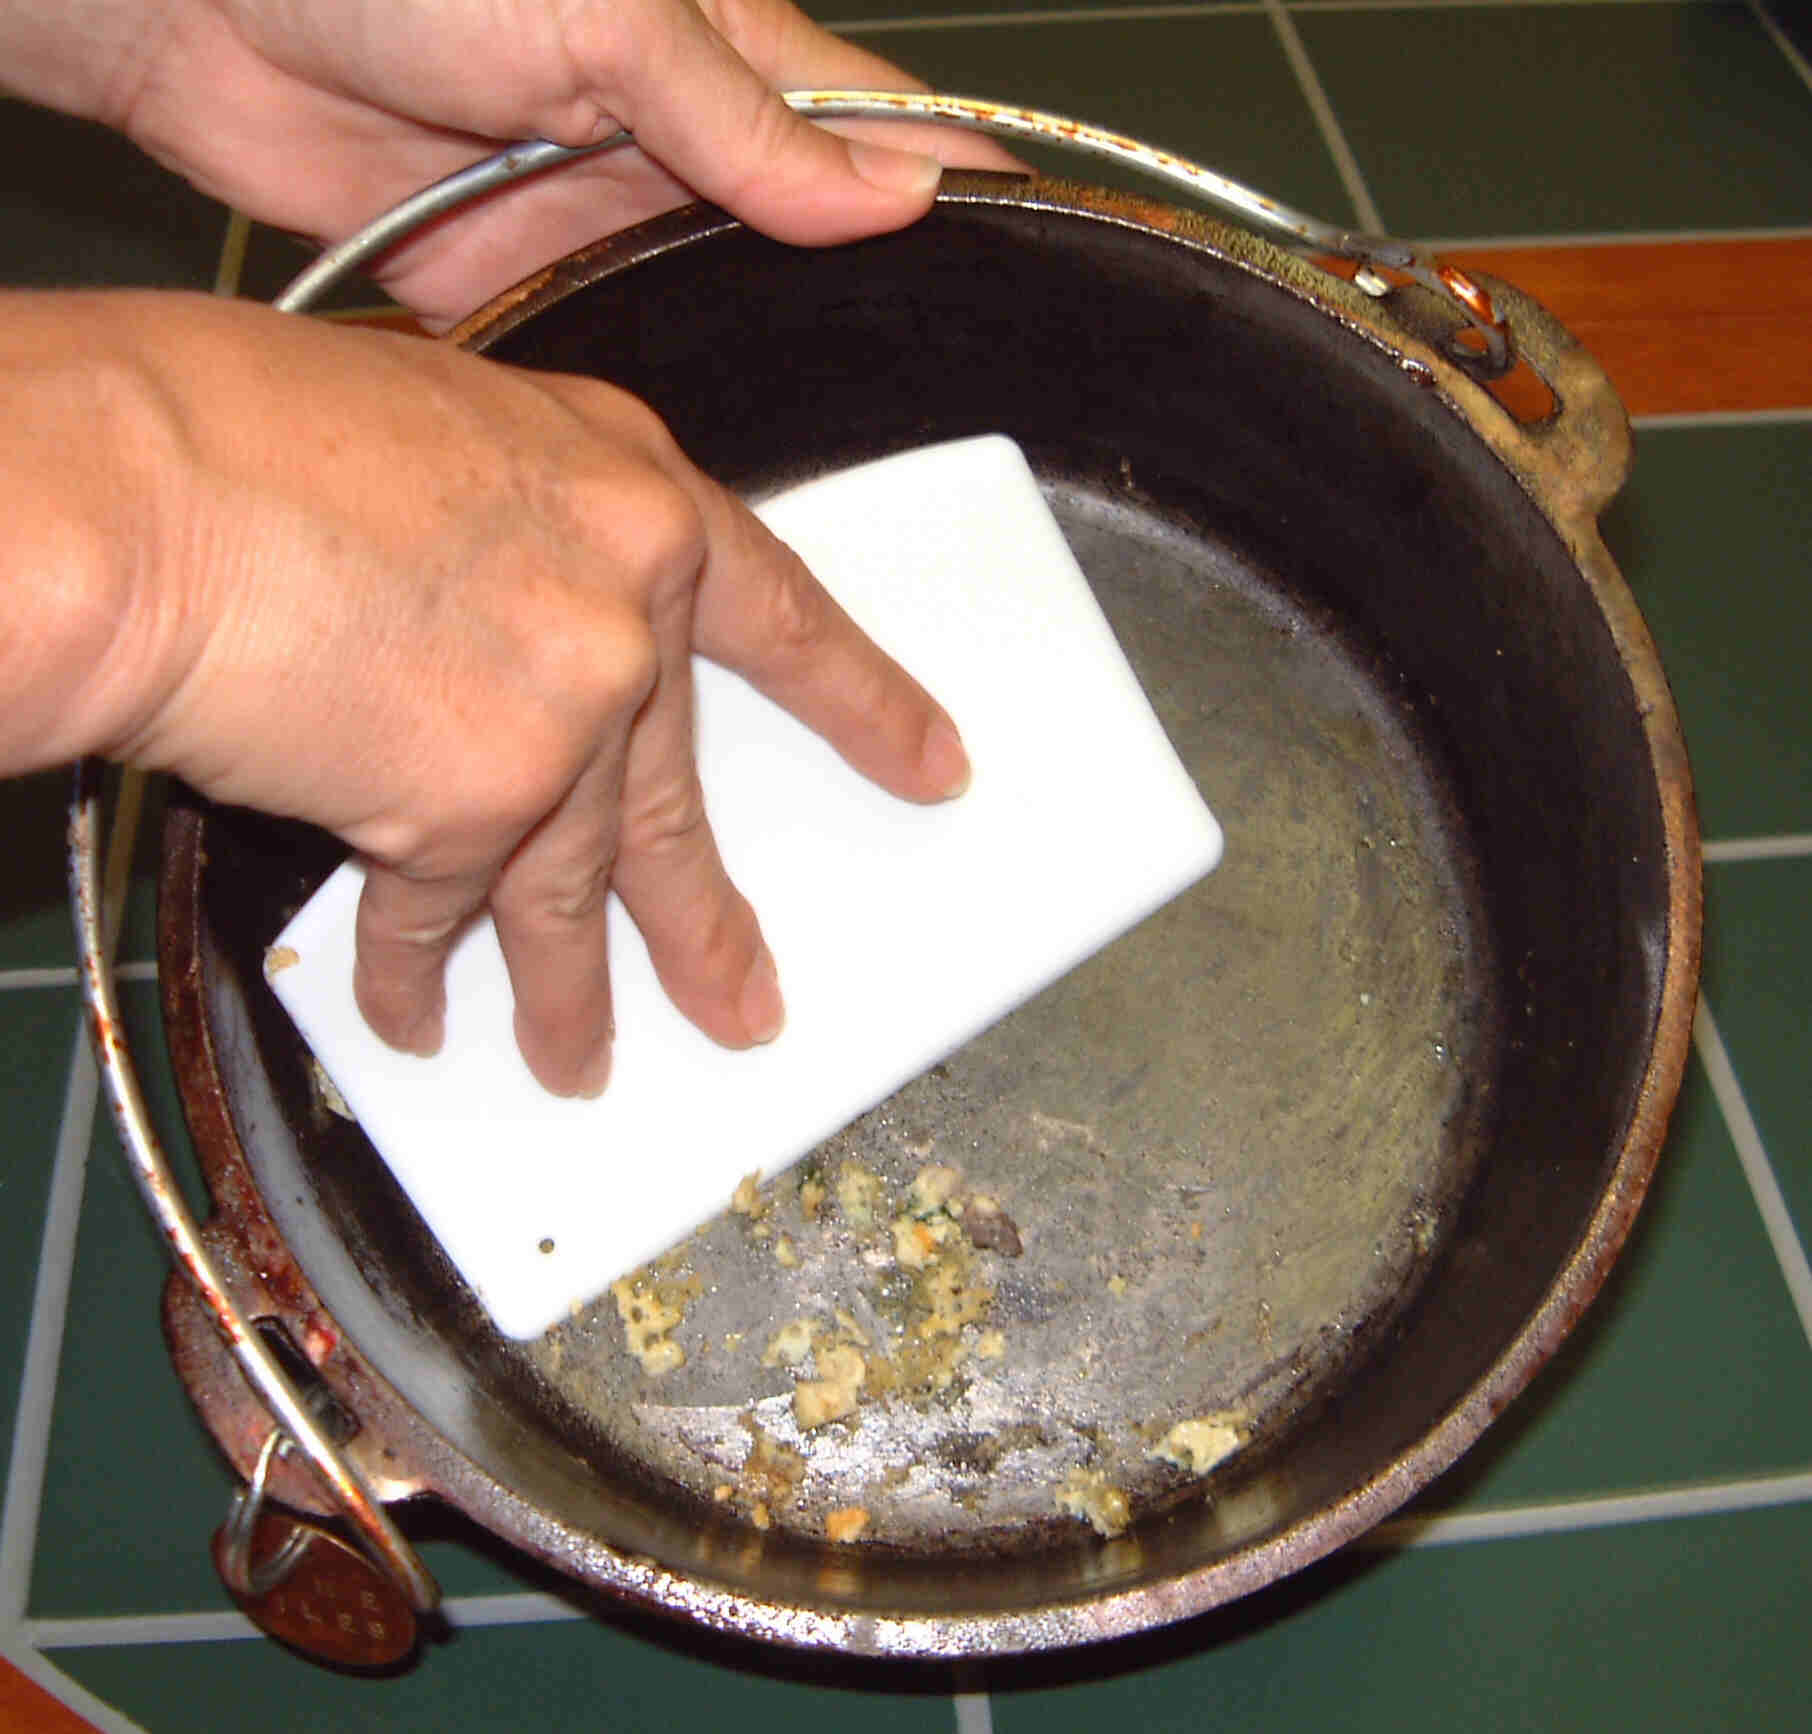 |
Using a plastic scrapper, carefully scrap out the excess food. |
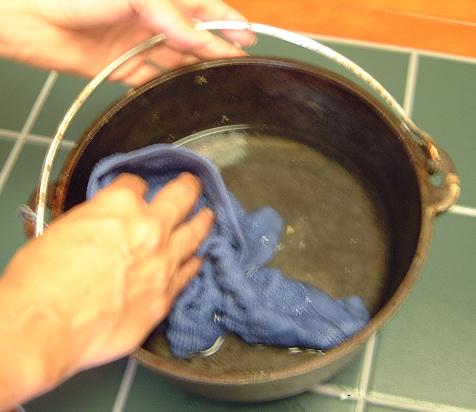
| With a little warm water and a dish cloth finish cleaning the inside of oven. Drain wash water and rinse with warm water. |
 |
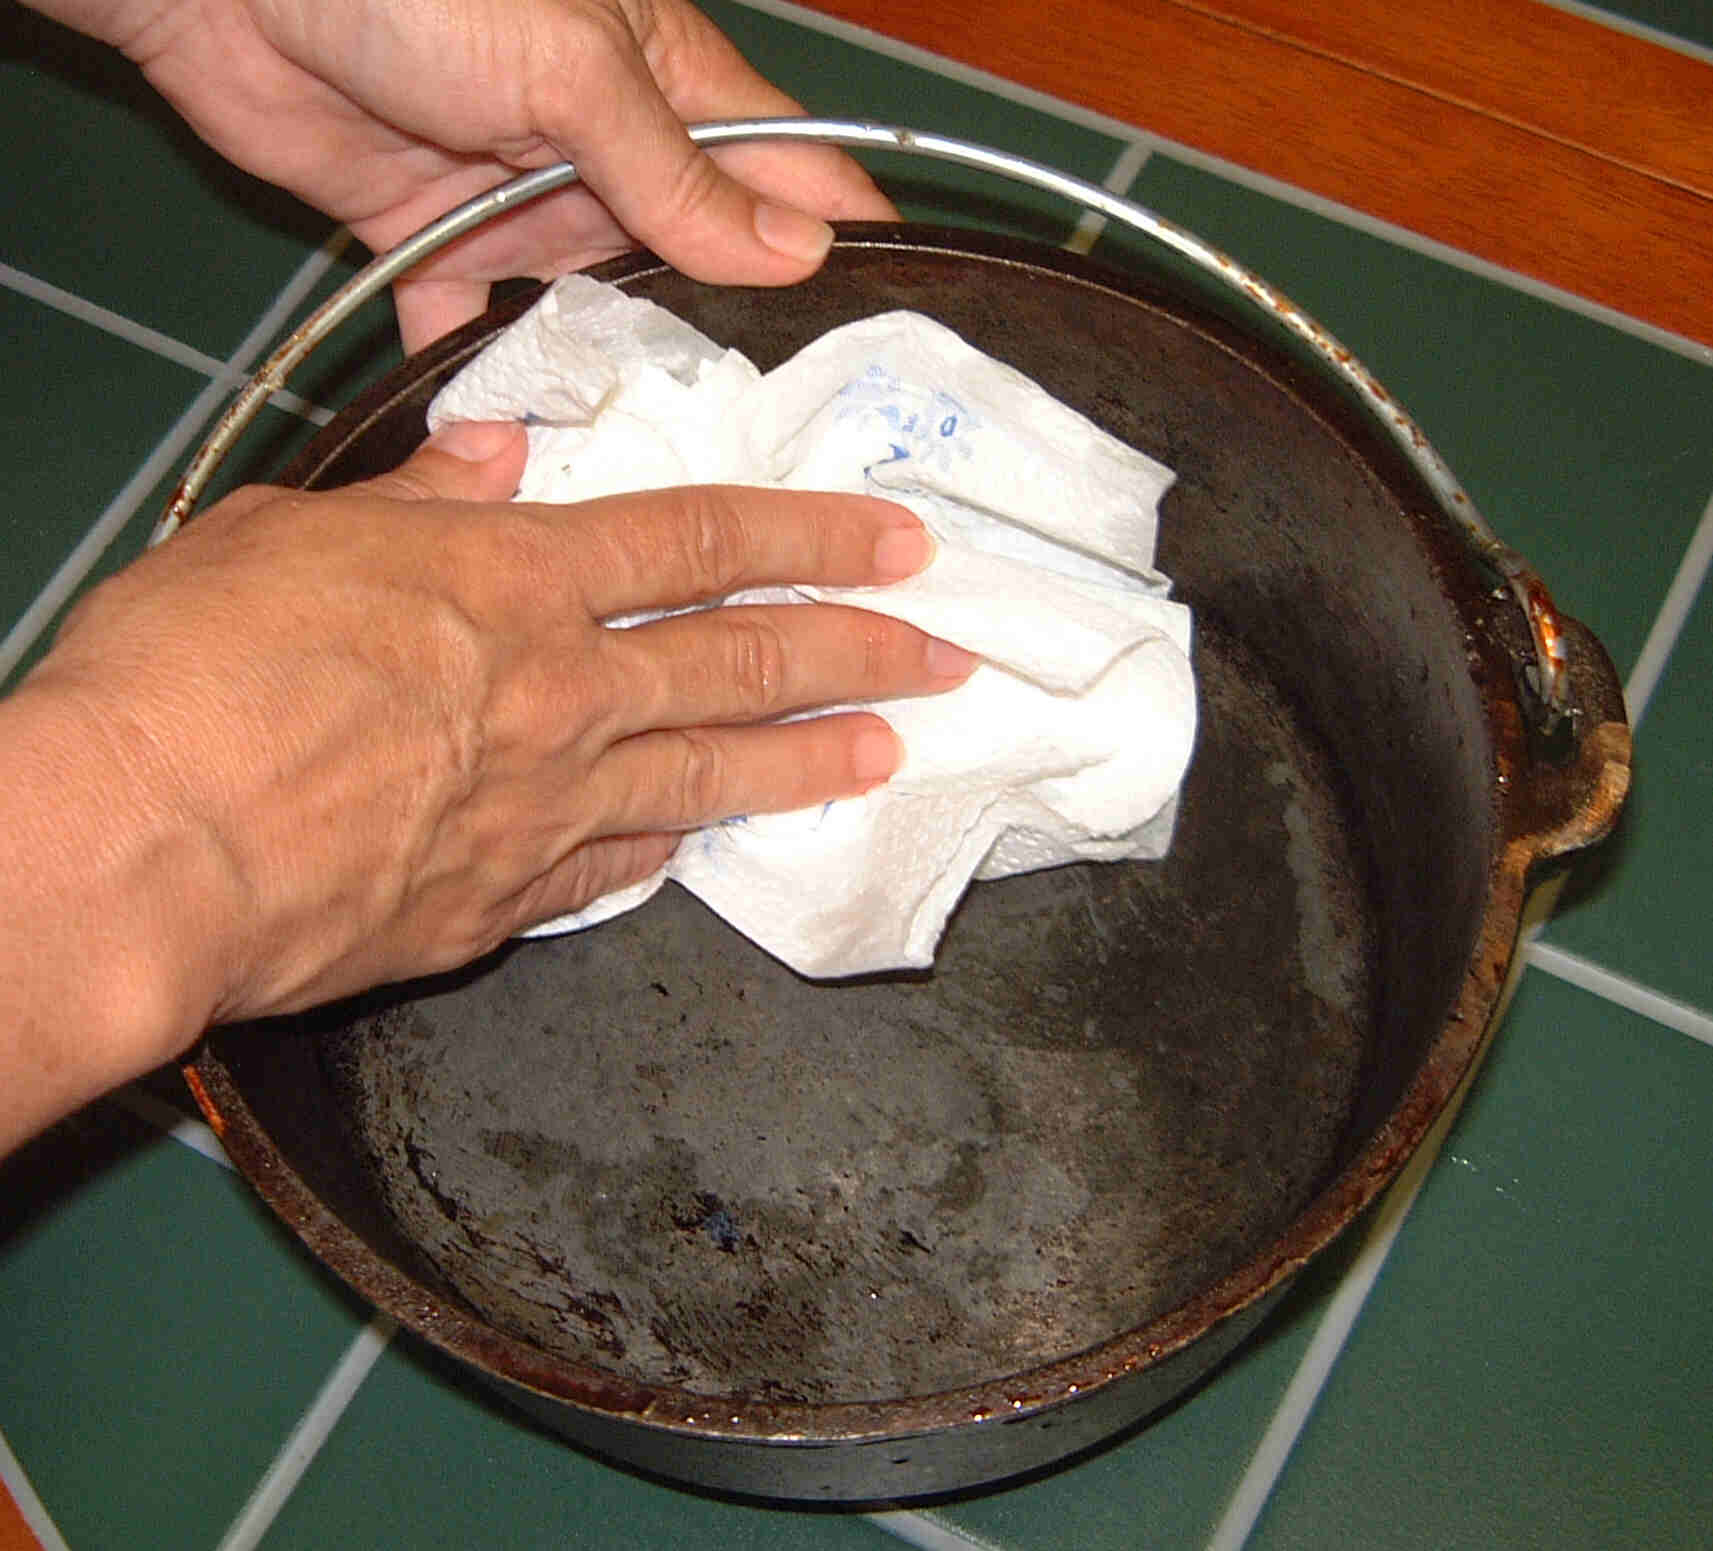 |
Thoroughly dry the Dutch oven with paper towel or warm it on the gas stove or over a fire just enough to completely dry the oven |
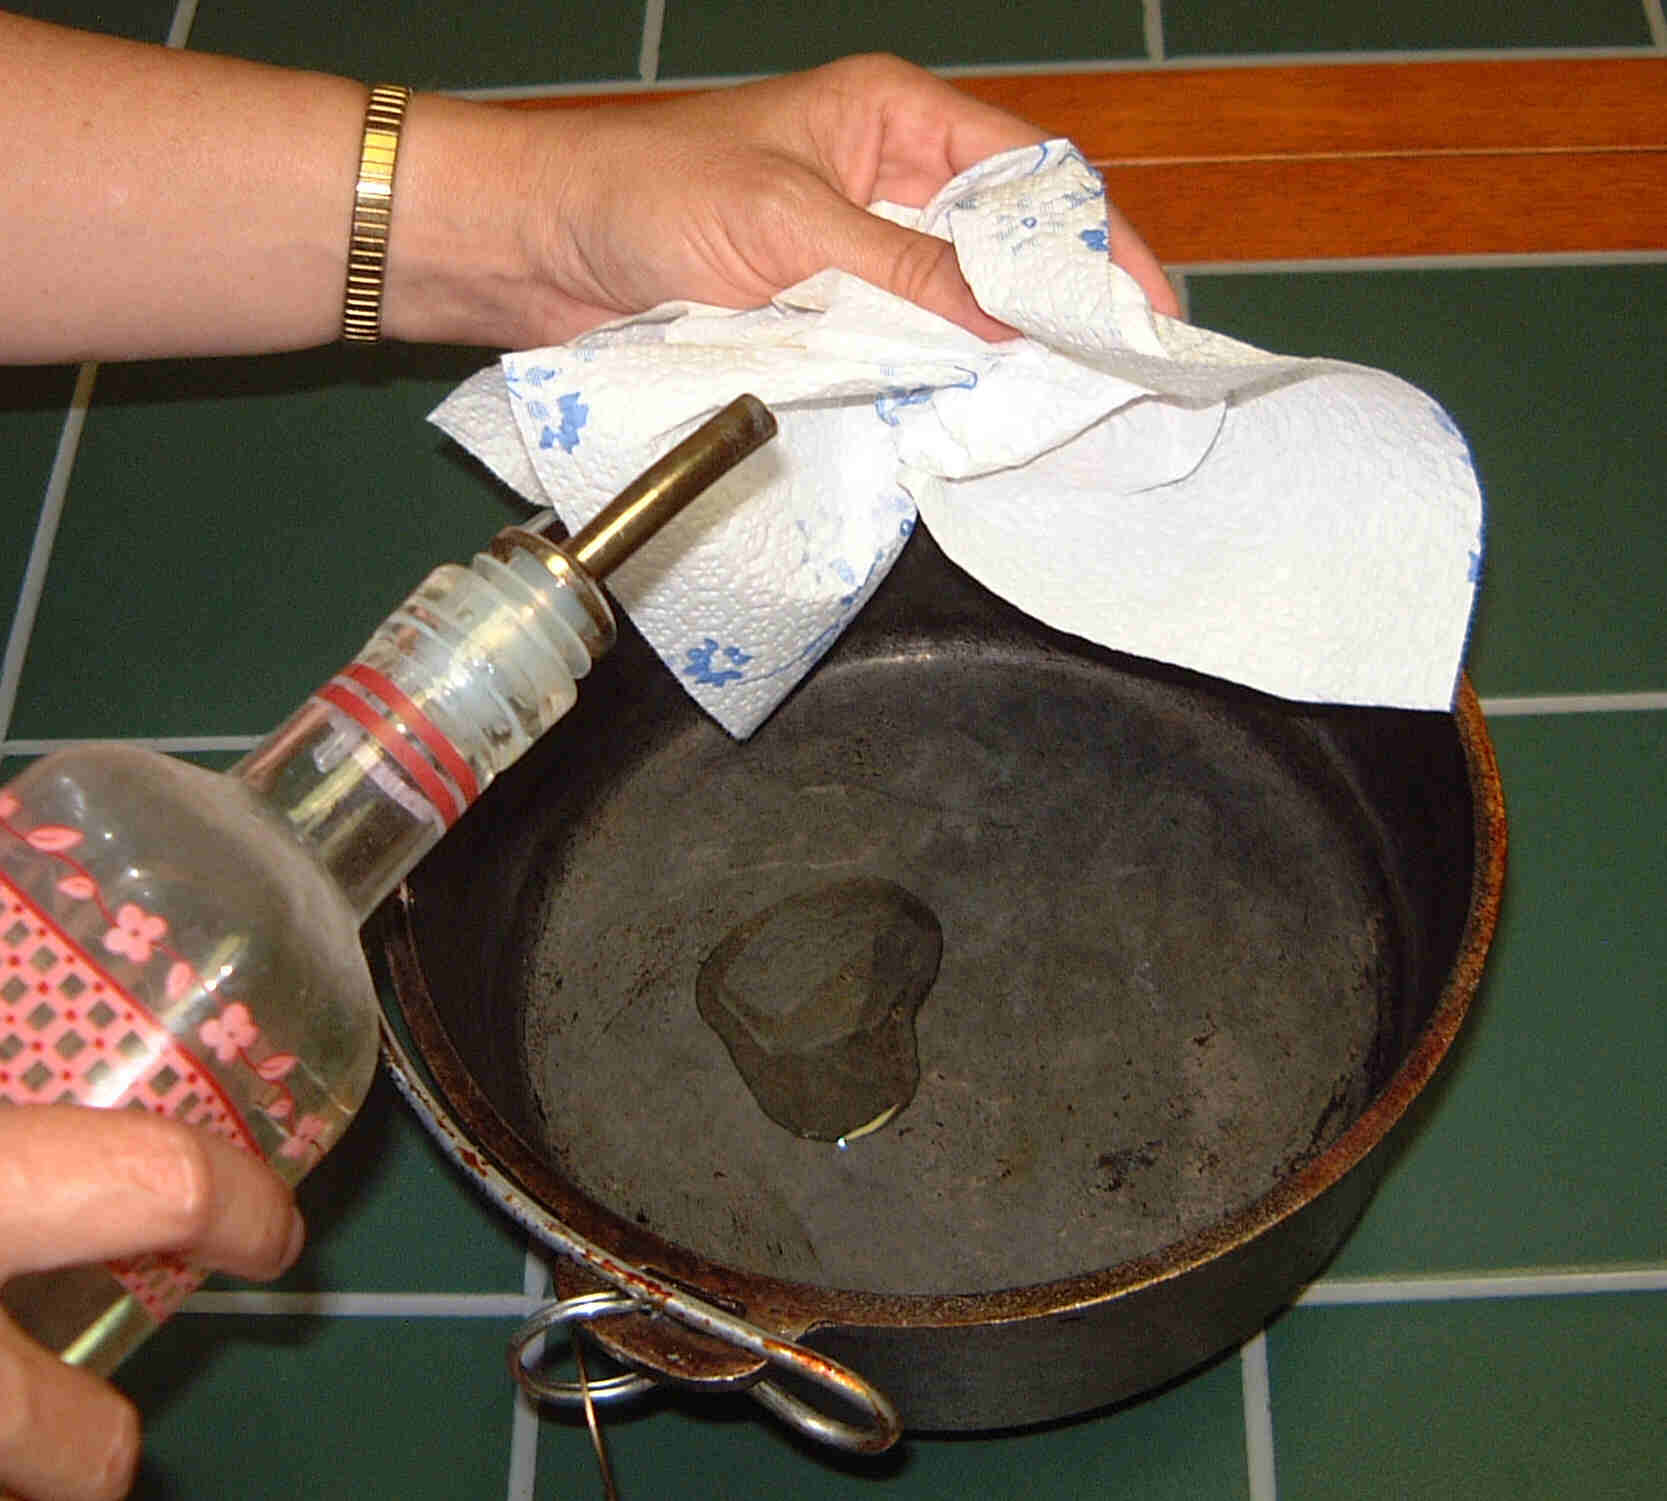
| Using a paper towel or soft cloth, wipe a "thin" coating of oil over the entire oven. (If the oven is well seasoned you will only need to do this step once in a while.) |
 |
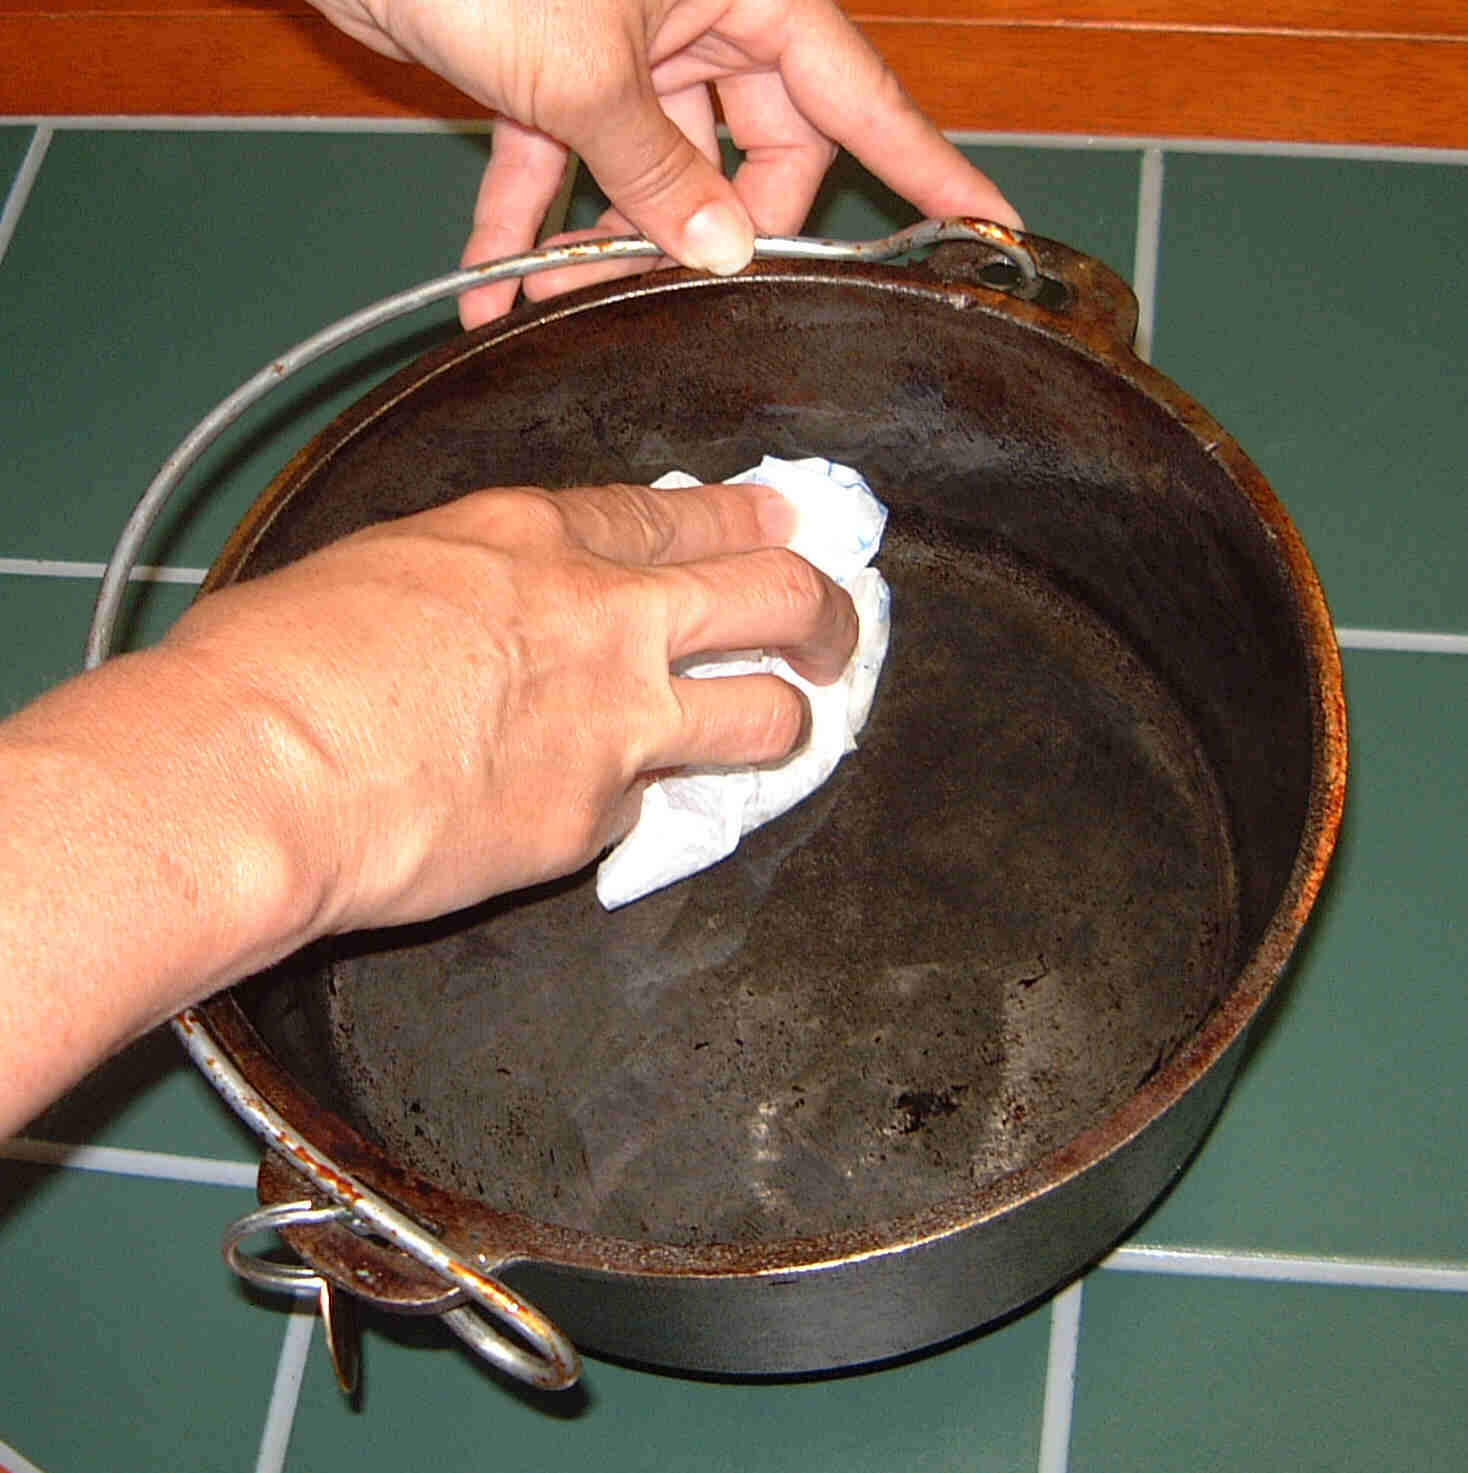 |
Make sure to wipe out excess oil so that it doesn't turn rancid when not in use. |
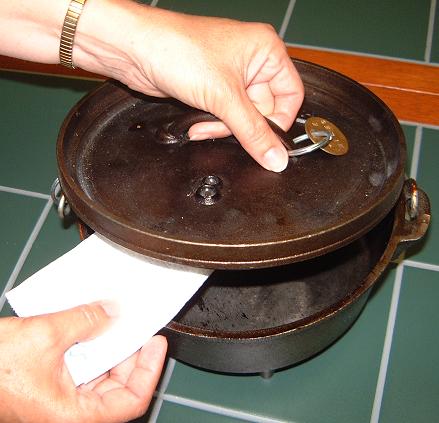
| To store, place a paper towel under the lid and hanging slightly out the side to absorb any excess oil and moisture and to allow some air into the oven. |
 |
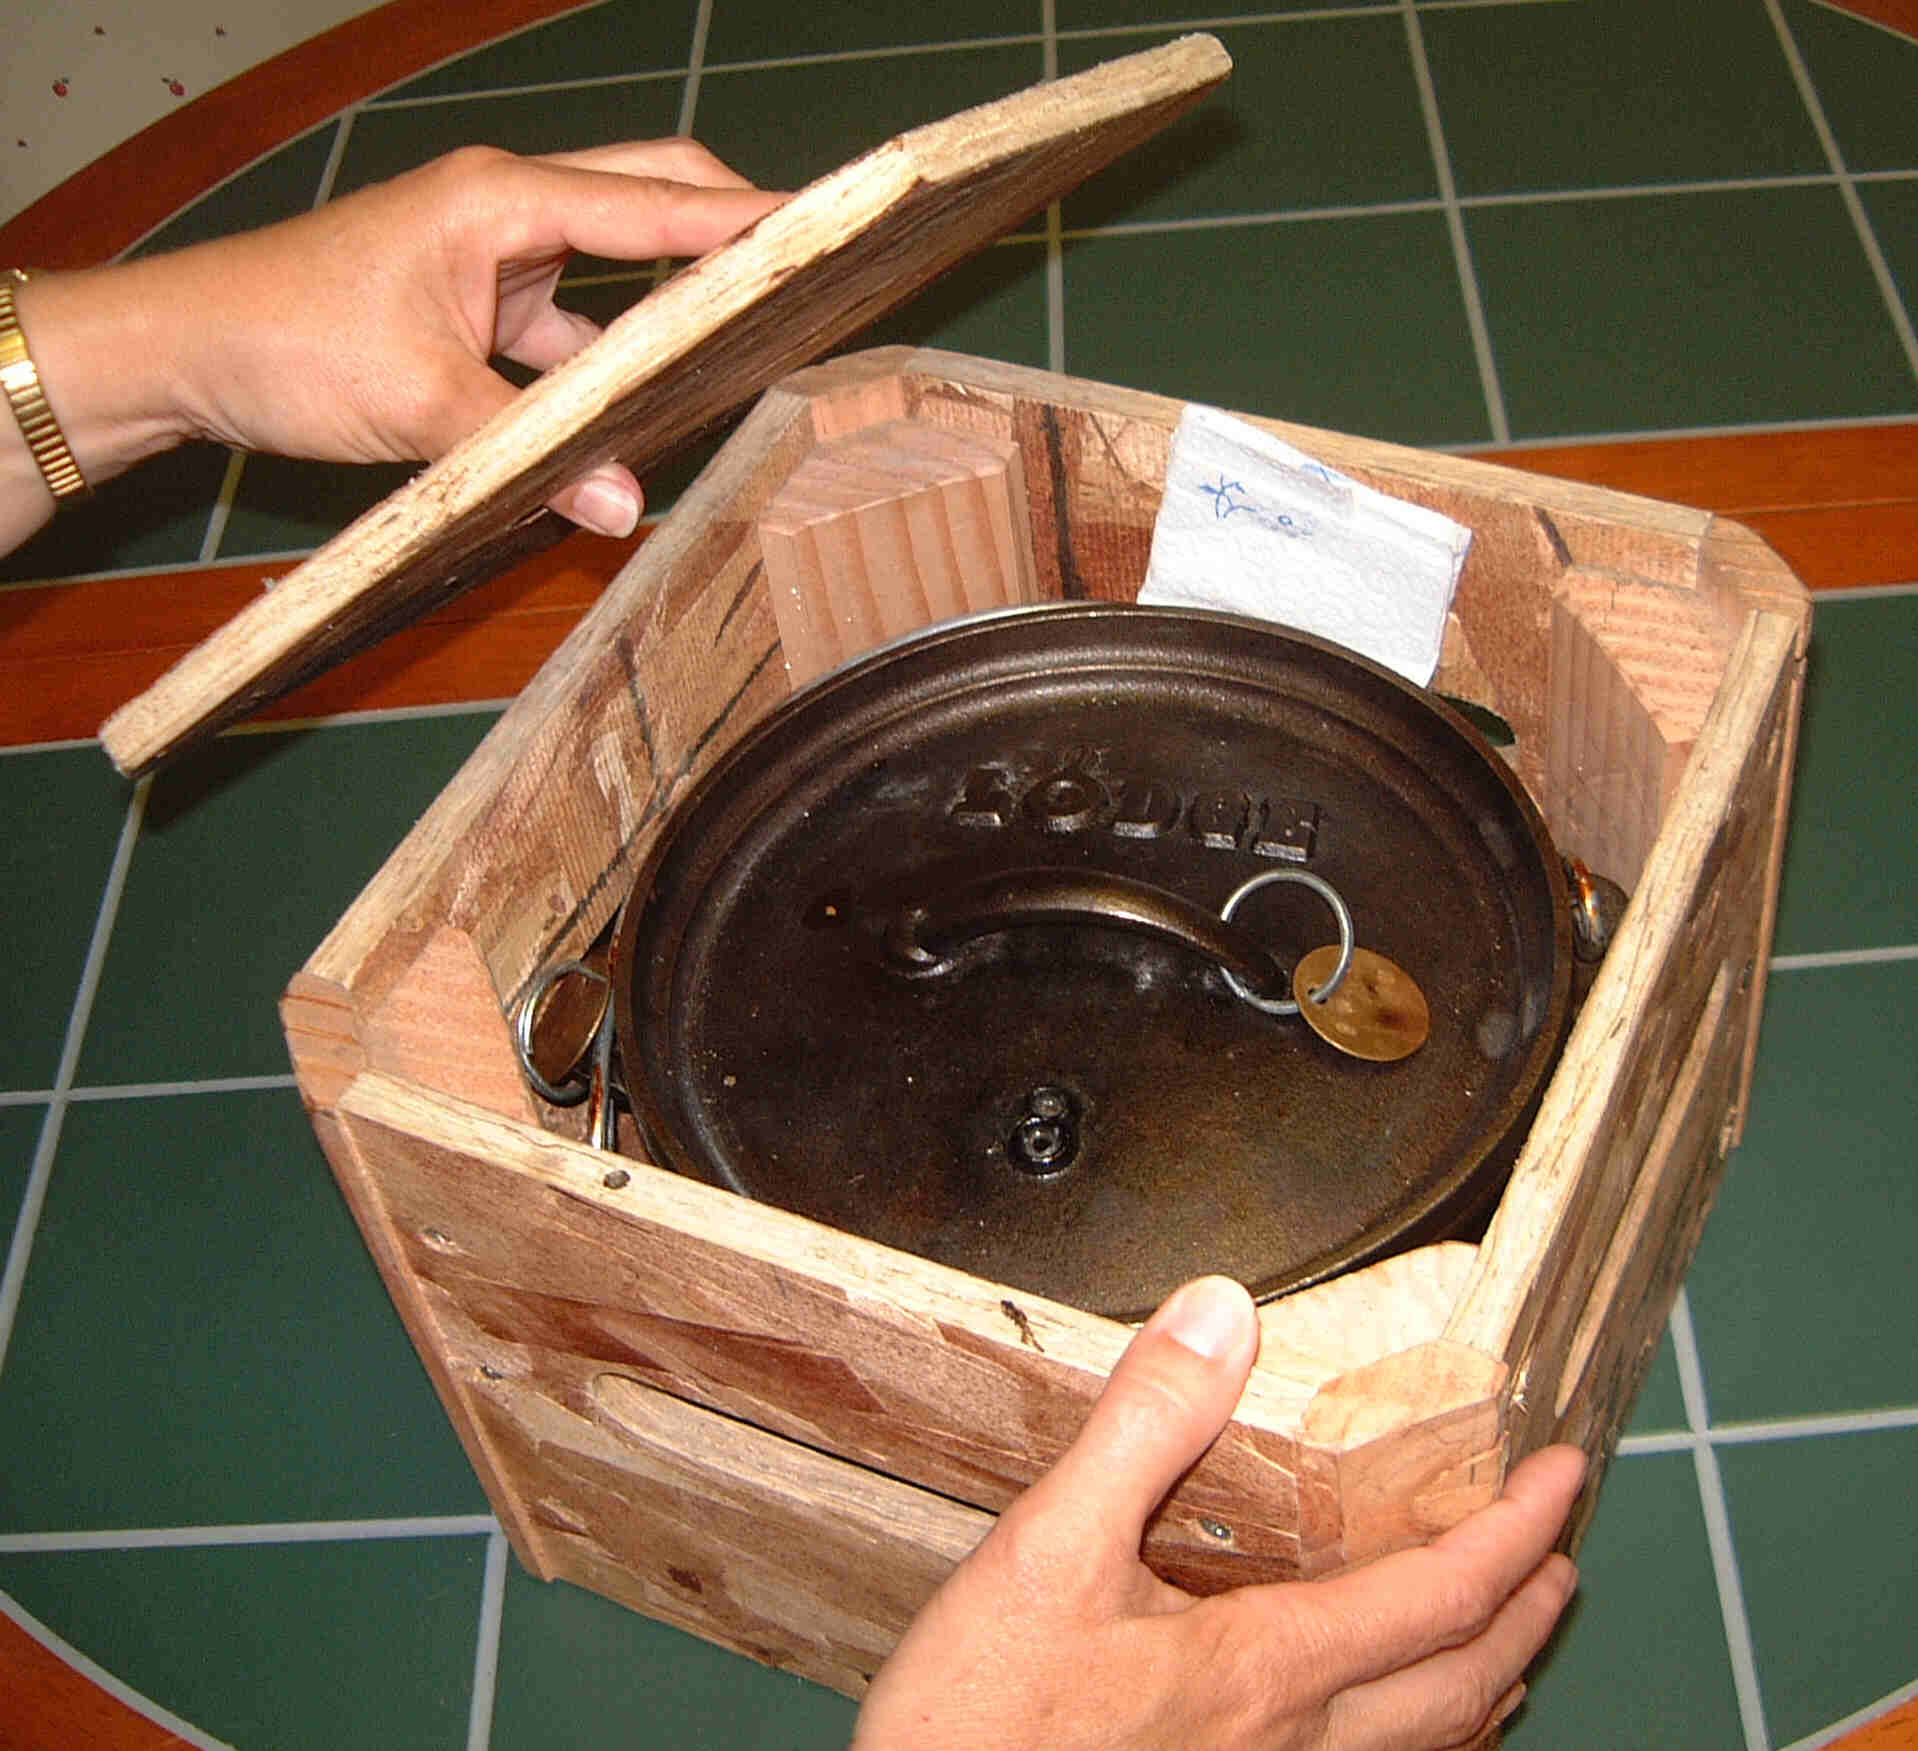 |
Dutch ovens can be stored in wooden boxes.... |
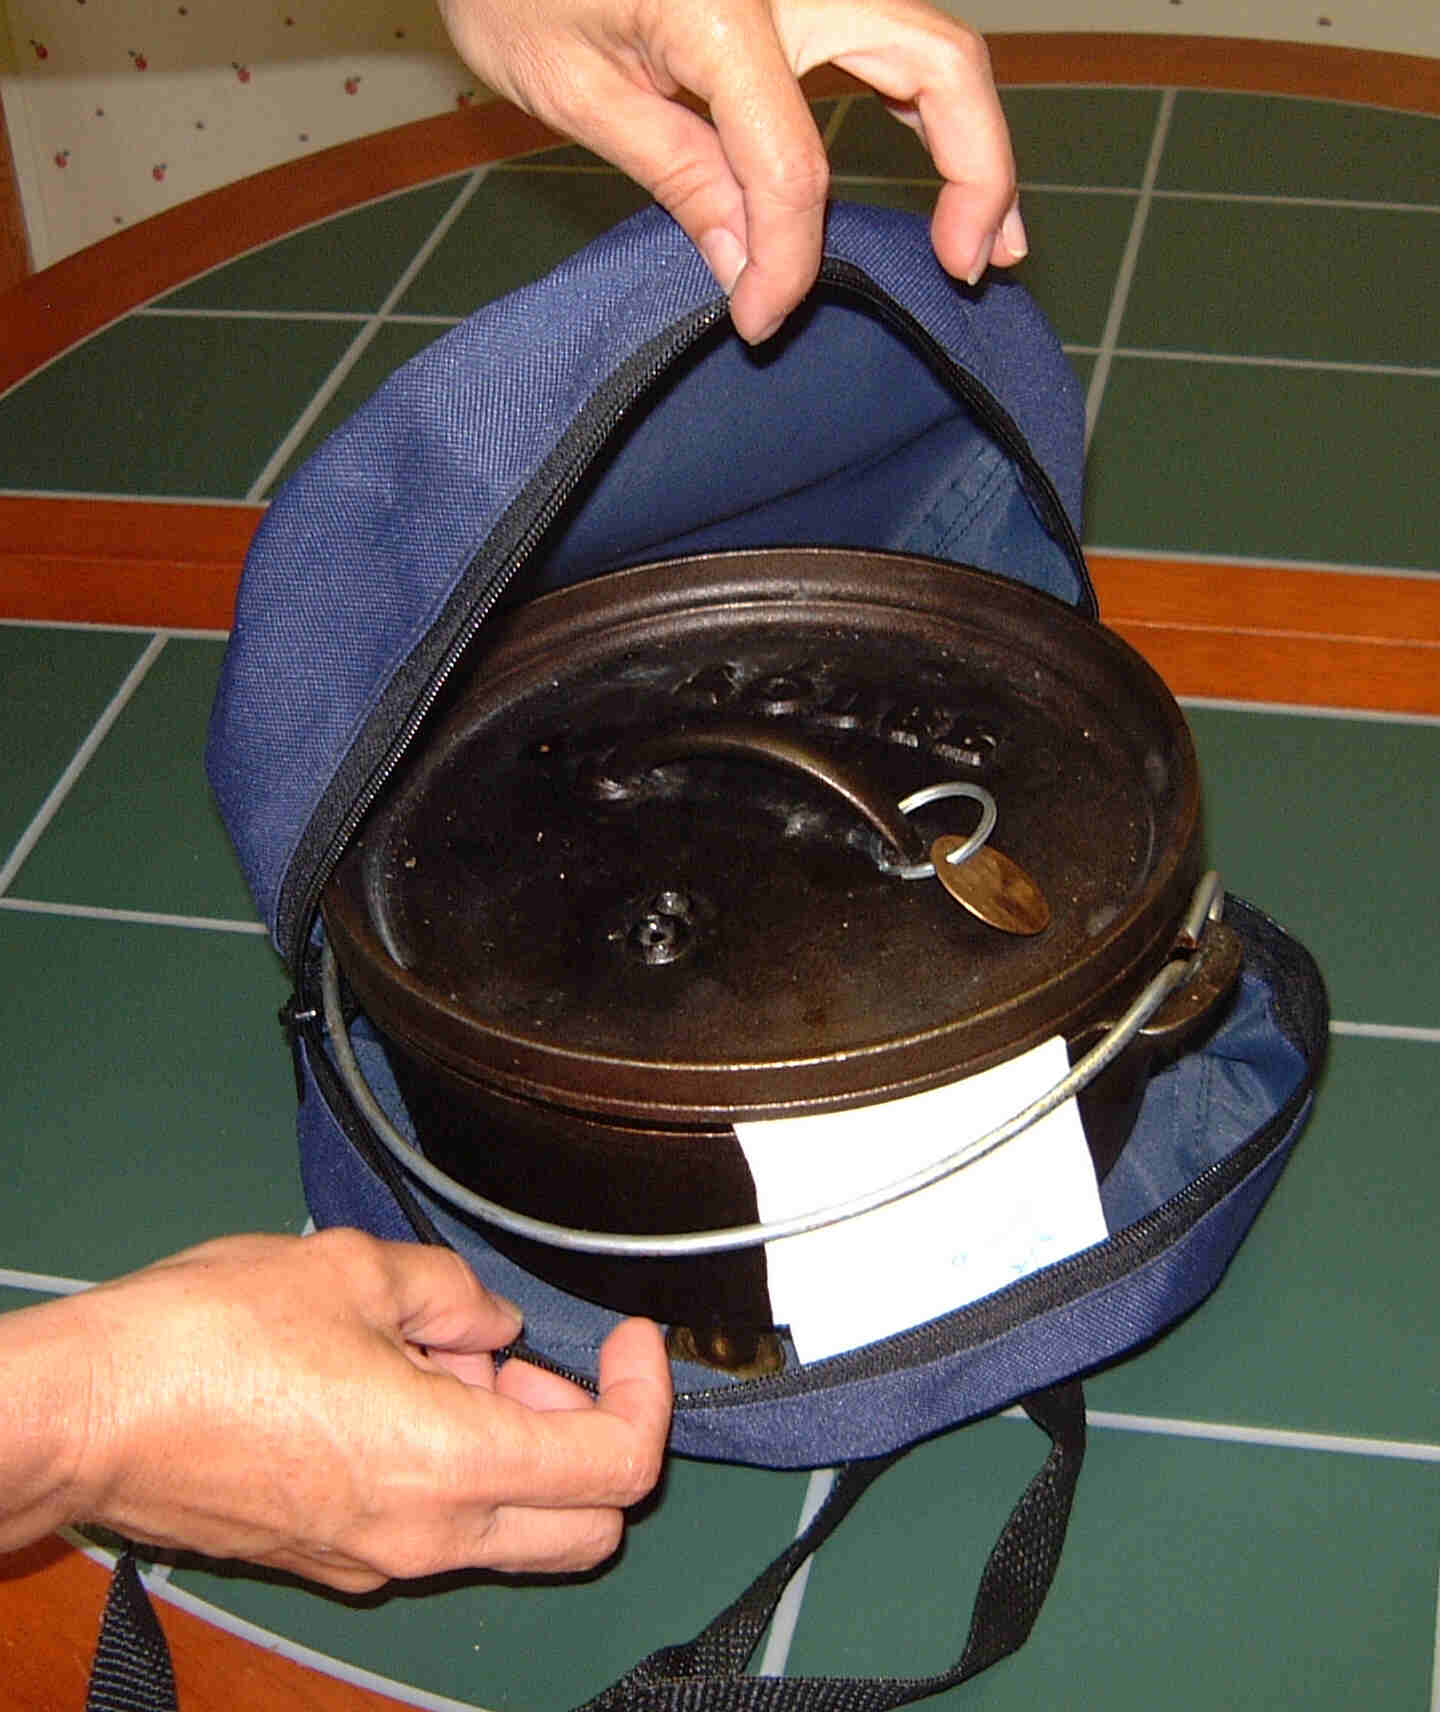
| ...or in nylon bags. Store ovens where they will stay dry. |
 |
Q: What is the best heat source for a Dutch oven?
A: Charcoal briquettes are the easiest to use and best for controlling the temperature.
Q: How many briquettes do I use to achieve the desired temperature?
A: Keep in mind the briquettes must be applied to both the top and the bottom. Use only quality charcoal briquettes for consistent temperature control. (We recommend Kingsford even though we get no commission for the reference.) The chart below tells how many briquettes to use for a desired temperature. As a rule of thumb to achieve 325 degrees use the following method. Take the size of the oven and take that number of briquettes less three for the bottom and that number plus three for the top. For example with 12" oven you would place 9 briquettes on the bottom (12-3) and 15 briquettes on the top (12+3). This works for Lodge� Dutch ovens and GSI Aluminum ovens.
|
Temperature |
8" Oven |
10" Oven |
12" Oven |
14" Oven |
16" Oven | |||||
|
Degrees F |
Top | Bottom |
Top |
Bottom |
Top |
Bottom |
Top | Bottom |
Top |
Bottom |
|
300 |
10 | 4 |
12 |
6 |
14 |
8 |
16 | 10 |
18 |
12 |
|
325 |
11 | 5 |
13 |
7 |
15 |
9 |
17 | 11 |
19 |
13 |
|
350 |
12 | 6 |
14 |
8 |
16 |
10 |
18 | 12 |
20 |
14 |
|
375 |
13 | 7 |
15 |
9 |
17 |
11 |
19 | 13 |
21 |
15 |
Note: Adding one set of briquettes (one on top and one on bottom) will raise the temperature of the Dutch Oven approximately 25 degrees. Or conversely removing one set of briquettes will lower the temperature by 25 degrees.
For the MACA Dutch ovens more briquettes are needed to compensate for the depth and thickness of the ovens. Take the diameter of the MACA Dutch oven and add three briquettes for the bottom heat. Then add six to the diameter of the Dutch oven to get the number of briquettes for your top heat. This gives you a temperature of about 325� F. For example with a 15" Dutch oven your will need 18 charcoal briquettes for the bottom heat and 21 charcoal briquettes for the top heat to achieve a temperature of 325� F.
Q: Can I cook in the Dutch oven using wood as a heat source?
A: With a little know how and practice you can learn to effectively use wood as a heat source without cremating your meal. The best type of woods for cooking are hardwoods such as hickory, oak, mesquite and hard maple. Pecan, walnut, and Osage orange would also work. Not all hardwoods produce good coals.
Soft woods such as pine, poplar, and cottonwood don't make good coals for Dutch oven cooking because they burn hot for a short period of time, and then burn out quickly.
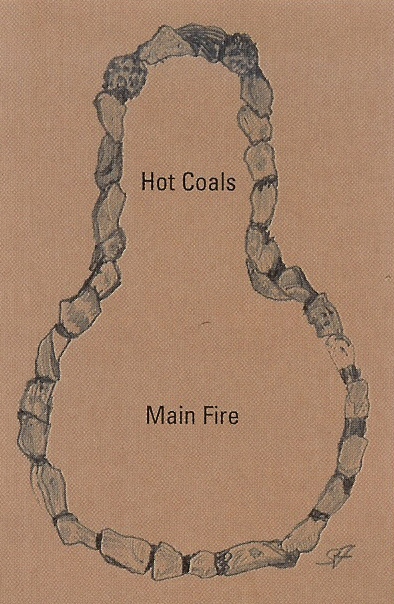
Start the hardwood fire at least 45 minutes before you need to start cooking. If you use a "Key Hole" fire ring (see drawing) you can keep a fire going at the circular end and move the coals to the long thin end to cook.
Try to keep the wood coals a uniform size. Use a long handled shovel to move the coals where you need them. Put about twice as many coals on the lid of the Dutch oven as you put on the bottom of the oven. It is best to arrange them in a ring around the outside edges of the pot. Don't over do on the amount of coals you put on and under the Dutch oven. Check your pot about every fifteen minutes to determine the doneness of the food. After checking the food, move the lid a quarter turn one direction and the pot a quarter turn in the opposite direction to avoid hot spots. Wood coals do not burn as long as charcoal briquettes so they must be replenished often.
Ideas taken from J. Wayne Fears' book The Complete Book of Dutch Oven Cooking.
Q: What size of Dutch Oven do I need?
A: The following chart will help you decide what size of Dutch Oven you will need to serve various group sizes.
|
SIZE
|
DEPTH
|
QUARTS
|
SERVINGS
|
|
|
5"
|
2 1/2"
|
.5
|
main dishes: |
1-2
|
|
side dishes:
|
2-4
|
|||
|
8"
|
2 1/2"
|
2
|
main dish
|
2-6
|
|
side dish
|
8-10
|
|||
|
10"
|
3"
|
4
|
main dish
|
2-12
|
|
side dish
|
8-10
|
|||
|
12"
|
3 1/2"
|
6
|
main dish
|
6-18
|
|
side dish
|
to 30
|
|||
|
12"
|
5"
|
8
|
main dish
|
8-25
|
|
side dish
|
to 40
|
|||
|
14"
|
3 1/2"
|
8
|
main dish
|
8-25
|
|
side dish
|
to 40
|
|||
|
14"
|
5"
|
11
|
main dish
|
10-35
|
|
side dish
|
to 55
|
|||
|
16"
|
3 1/2"
|
12
|
main dish
|
12-38
|
|
side dish
|
to 60
|
|||
|
SIZE
|
DEPTH
|
QUARTS
|
SERVINGS/USE *
|
|
|
13"
|
6 1/2"
|
12
|
main dish
|
38
|
|
side dish
|
64
|
|||
|
whole chicken, bundt cakes, crown roasts, small
turkeys
|
||||
|
15"
|
7 1/2"
|
16
|
main dish
|
50
|
|
side dish
|
85
|
|||
|
crown roasts, turkeys to 18lbs, hams
|
||||
|
17"
|
9"
|
30
|
main dish
|
96
|
|
side dish
|
160
|
|||
|
turkeys to 25 lbs, prime ribs, to 16 lbs.
|
||||
|
22"
|
10"
|
64
|
main dish
|
200
|
|
side
|
325
|
|||
|
turkeys to 40 lbs, prime ribs to 24 lbs.
|
||||
Reprinted with permission from "LOVIN' DUTCH OVENS" by Joan S. Larson pages 10-11
Q: Can you tell me what equipments does one need for Dutch Oven Cooking?
Chuckwagon Supply
185 S Main Hwy
Clifton, ID 83228 801) 920-9004 chuckwagonsupply(at)yahoo.com
|
Company Information |
Products/ Services |
Tips
& Techniques |
Recipe Archive |
Events
& Contacts |
|
Copyright 1999, 2000 Chuckwagon Supply All rights reserved |